Let’s have a look at IPv6 support and some history of the Apple MacOS implementation of IPv6, the new Internet Protocol.
For IPv6 on Microsoft Windows and Linux we have silimar guides!
Of course, Apple MacOS or previously OS X have been early to adopt IPv6 and the implementation in Sonoma, Catalina and other recent versions can today be called complete and stable. By default IPv6 on Mac OS, is enabled and does not have to be configured manually, unless you want to.
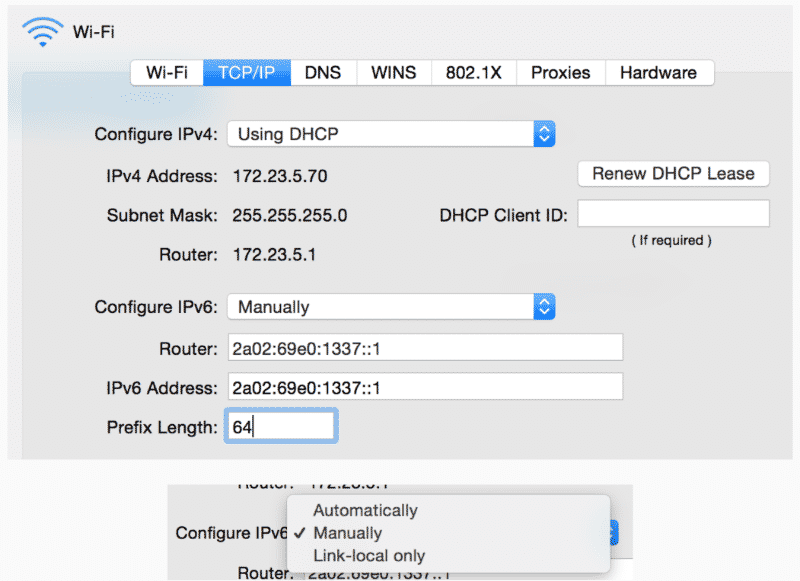
The screenshot above has a manual configuration using the graphical user interface (GUI) highlighted. Usually the option selected will be Automatic on a regular client.
There are also CLI commands for MacOS that I would like to show you.
Be aware, that in general you can use most open source GNU core utilities also on a Mac by installing homebrew. I like to have some of my favorite “gnutils” handy on my Mac.
The following commands are all built-in MacOS commands, no additional 3rd party components!
Please watch my following video with an introduction to IPv6 for the different operating systems, including Mac OS:
How to display addresses for IPv6 on Mac in Terminal
$ ifconfig
lo0: flags=8049<UP,LOOPBACK,RUNNING,MULTICAST> mtu 16384
	options=1203<RXCSUM,TXCSUM,TXSTATUS,SW_TIMESTAMP>
	inet 127.0.0.1 netmask 0xff000000
	inet6 ::1 prefixlen 128
	inet6 fe80::1%lo0 prefixlen 64 scopeid 0x1
	nd6 options=201<PERFORMNUD,DAD>en0: flags=8863<UP,BROADCAST,SMART,RUNNING,SIMPLEX,MULTICAST> mtu 1500
	options=400
	ether f0:18:98:13:23:1d
	inet 172.23.5.46 netmask 0xffffff00 broadcast 172.23.5.255
	inet6 fe80::ee:7e0d:8941:1be5%en0 prefixlen 64 secured scopeid 0x6
	inet6 2003:c8:b711:300:c18:348e:7db5:8468 prefixlen 64 autoconf secured
	inet6 2003:c8:b711:300:852:3b02:5db2:3c18 prefixlen 64 autoconf temporary
	nd6 options=201<PERFORMNUD,DAD>	media: autoselect
	status: active
utun0: flags=8051<UP,POINTOPOINT,RUNNING,MULTICAST> mtu 1380
	inet6 fe80::fb1d:654f:cfbf:16a1%utun0 prefixlen 64 scopeid 0xf
	nd6 options=201<PERFORMNUD,DAD>
I excluded about 80% of other output from this command, because it is really long. I still wanted to provide this semi-full output for you to be able to read and understand the different IPv6 addresses on this MacBook Pro which is just connected to WiFi. From what you have learned this far, you should be able to make sense of them all. Or you can read back some more.
Like stated before, you can also install the iproute2 GNU packages from homebrew to gain access to the regular GNU utils if you prefer those.
You can get the output from only one single interface with the following command:
ifconfig en0What is my IPv6 Address on Mac?
There are to ways to find your IPv6 address on your Mac:
1. The visual way via:
System Settings > Network > Your Network interface such as “Wi-Fi” or Ethernet.
The last statement will list the Mac’s IPv6 address.
2. the CLI way (which you can also use in scripts to automate things):
ifconfig | grep 'inet6' | grep -E -v '(fe80|fd69| ::1)'it begins with the ifconfig command, which displays all network interfaces and their associated configurations. The output of ifconfig is then piped (|) to the grep 'inet6' command, which searches for and outputs lines containing the string “inet6”, indicating IPv6 addresses.
This output is further piped to another grep command with the -E option (to use extended regular expressions) and -v option (which inverts the matching). The second grep command filters out lines containing any of the following patterns: ‘fe80’, ‘fd69’, or ‘::1’. These patterns correspond to link-local IPv6 addresses (starting with ‘fe80’), unique local addresses (ULA, starting with ‘fd69’), and the IPv6 loopback address (‘::1’).
The resulting output is the globally routable IPv6 address of your Mac.
How to configure a static address for IPv6 on Mac in Terminal
sudo ifconfig en0 inet6 2003:c8:b711:300:c18:348e:7db5:9999 prefixlen 64 aliasYou need the sudo command to do this system level change, unless you are already root (su), which your regular user account should not be.
How to remove a static address for IPv6 on Mac in Terminal
sudo ifconfig en0 inet6 delete 2003:c8:b711:300:c18:348e:7db5:9999 prefixlen 64To remove an address, just add the delete word and drop the alias word. That’s it. Verify correct removal with ifconfig <interface-name>, e.g. ifconfig en0.
How to display the neighbor cache for IPv6 on Mac
$ ndp -andp is the MacOS tool to control and diagnose the IPv6 neighbor discovery protocol. Check out man ndp for full functionality or this very similar FreeBSD ndp man page.
How to configure a default route for IPv6 on Mac
sudo route add -inet6 ::/0 fe80::ee:7e0d:8941:1be5%en0On MacOS, if you set a default route via a Link-Local address (fe80::), you have to add the outgoing interface with %interface (like in the above example -> %en0) to the command, or else the operating system cannot know which interface is facing the default router!
A default route is probably the most important route for a host, because it acts as a catch-all route and all traffic that is not sent to another “more specific” destination is sent here…
With IPv6, remember the special destination in this case is ::/0, which means “all routes“
How to set a generic route for IPv6 on Mac
sudo route add -inet6 2a02:69e0::/32 2003:c8:b711:300:::1Apart from one default route, we might have the need for additional more specific routes or special routes, that are reachable via a different path than the default route. The syntax is essentially the same, just replace the special route ::/0 with a more specific in the same prefix/length notation that is specific for IPv6.
You do not need to include the %interface here, because we are using a global address as the next hop, which is unique and the operating system knows which interface it is connected to. It would also be possible to route via a Link-Local address again, but in this case the %en0 would be necessary like in the previous default route example!
How to remove a generic route for IPv6 on MacOS
sudo route delete -inet6 ::/0 fe80::ee:7e0d:8941:1be5%en0Any route like more specifics and the default route can be removed again using the above delete command, which is identical to the command to add a route, just replace the add with a delete.
How to display the routing table for IPv6 on Mac
$ netstat -rn
Internet6:
Destination                             Gateway                         Flags         Netif Expire
default                                 fe80::%utun0                    UGcI          utun0
::1                                     ::1                             UHL             lo0
2003:c8:b711:300::/64                   link#6                          UC              en0
2003:c8:b711:300:852:3b02:5db2:3c18     f0:18:98:13:23:1d               UHL             lo0
2003:c8:b711:300:c18:348e:7db5:1        link#6                          UHLWIi          en0
At last, there is the one simple command to display the Apple MacOS routing table. The command first outputs the IPv4 routing table, you need to scroll down a bit until the part that starts with Internet6.
How to do a Ping to verify connectivity for IPv6 on Mac
$ ping6 google.com
PING google.com(2a00:1450:400c:c0a::65) 56 data bytes 64 bytes from 2a00:1450:400c:c0a::65: icmp_seq=1 ttl=54 time=12.7 ms 64 bytes from 2a00:1450:400c:c0a::65: icmp_seq=2 ttl=54 time=13.0 ms 64 bytes from 2a00:1450:400c:c0a::65: icmp_seq=3 ttl=54 time=13.0 ms 64 bytes from 2a00:1450:400c:c0a::65: icmp_seq=4 ttl=54 time=12.9 ms
Huh? Yes, you’re right, the syntax and output of ping6 on Mac is exactly the same as on Linux. Ping6 is the IPv6 alternative to the old ping command that is used for IPv4. Ping is used to check if there is end-to-end reachability between your host and a destination. You can either use an IPv6 address for the destination, or use a DNS name (it works!) but be aware – when using a DNS name you cannot be 100% sure that IPv6 is used as transport instead of IPv4.
Check out the parts about Source Protocol Selection and Source Address Selection to understand which Protocol and which address is used when initiating a connection!
How to do a Traceroute to verify Routing and Path for IPv6 on Mac
$ traceroute6 google.com
traceroute to google.com (2a00:1450:400c:c0a::8b), 30 hops max, 80 byte packets
 1  denuecore01.pall.as (2a02:69e0:500::1)  0.717 ms
 2  denuecore00-2.pall.as (2a01:4f8:0:e0b0::25)  0.320 ms
 3  core12.hetzner.de (2a01:4f8:0:3::39)  0.389 ms
 4  2a01:4f8:0:3::fa (2a01:4f8:0:3::fa)  3.560 ms
 5  juniper4.ffm.hetzner.de (2a01:4f8:0:3::e)  3.521 ms
 6  de-cix10.net.google.com (2001:7f8::3b41:0:1)  40.654 ms
 7  2001:4860::1:0:4ca2 (2001:4860::1:0:4ca2)  4.579 ms
8  2001:4860::2:0:a94a (2001:4860::2:0:a94a)  12.977 ms
9  wl-in-x8b.1e100.net (2a00:1450:400c:c0a::8b)  12.736 ms
Same again, Traceroute is used to see the different routing (Layer 3) hops along the path of a packet that is transferred between the local host and a remote destination. The MacOS terminal command is also traceroute6 and it is the IPv6 alternative to the IPv4 traceroute command. You can either use an IPv6 address for the destination, or use a DNS name (it works!) but be aware – when using a DNS name you cannot be 100% sure that IPv6 is used as transport instead of IPv4.
Same as with Ping, check out the parts about Source Protocol Selection and Source Address Selection again to understand which Protocol and which address is used when initiating a connection.
How to see live Packet Loss using mtr for IPv6 on Mac
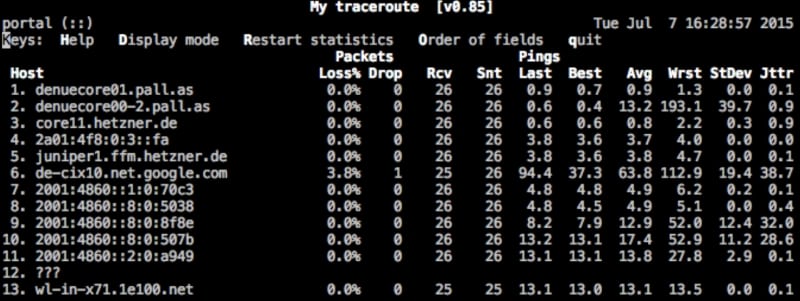
You know what traceroute is and why it is so helpful. The Linux utility My Traceroute (mtr), which is also available for MacOS via homebrew, does a kind of a live traceroute and sends packets every second. You are able to see live where packet loss happens or latency increases. I love this tool and highly recommend you try it out, for IPv6 and IPv4!
How to disable IPv6 on Mac
I cannot recommend disabling IPv6 on MacOS and suggest learning enough about it so you can configure and use it to its fullest potential. Still, in some cases you might want or even need to disable it.
The procedure to disable IPv6 on Catalina is the same as to disable IPv6 on Mojave and earlier Versions such as High Sierra an so on.
First, find out what your “Network Service” is called, that you want to disable IPv6 on:
$ networksetup -listallnetworkservices
An asterisk (*) denotes that a network service is disabled.
WiFi
iPhone USB
iPad USB
Bluetooth PAN
Thunderbolt Bridge
Mac: Device VPN
Now you can use this name in the following command to disable IPv6 on your Mac:
$ networksetup -setv6off WiFiThe WiFi keyword is coming from the output of the above command which lists all network services the Mac can see.
Verify with ifconfig, if all addresses have been removed accordingly.
Now that you know how to disable IPv6 on MacOS, I’m sure you can’t wait to turn it on again, because it is great and we love it:
How to enable IPv6 on Mac
I’m so glad you want to (re-) enable IPv6 on your Mac and it is not hard at all, just find out what your corresponding interface is called using this command:
$ networksetup -listallnetworkservices
An asterisk (*) denotes that a network service is disabled.
WiFi
iPhone USB
iPad USB
Bluetooth PAN
Thunderbolt Bridge
Mac: Device VPN
Now you can use this name in the following command to enable IPv6 on your Mac:
$ networksetup -setv6automatic WiFiAfter a couple of seconds you should have your Link-Local address(es) auto-generated using EUI-64 and maybe global addresses and routing active, check with ifconfig for addresses, netstat -rn for the IPv6 routing table and the other commands from this chapter.
Troubleshooting IPv6 on Mac
Watch my video on troubleshooting IPv6 on Mac:
Recommended Resources for additional reading
Apart from the links throughout this course I recommend the following resources for additional information:
- The Internet Society (ISOC) IPv6 Portal
- Test your IPv6 connectivity on test-ipv6.com
- The official IANA list of assigned IPv6 address space is very interesting
- The Google IPv6 deployment statistics
- The RIPE NCC IPv6 working group and mailing list
Book recommendations on IPv6
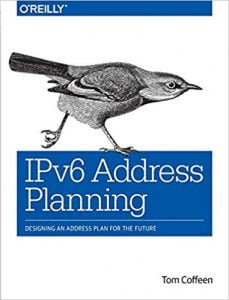
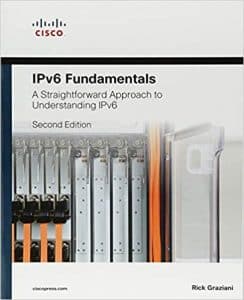
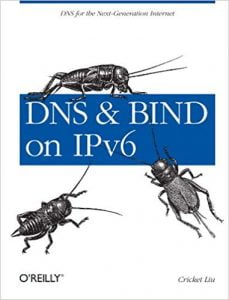
I can recommend the following 3 books which I enjoyed reading:
